No matter what you are selling or who you are selling to, every eBay sale starts with the creation of a listing. Putting a single product listing online is over in a few mouse clicks. However, if you are keen to list several items at once, managing your eBay account can be very time-consuming.
Creating new listings in bulk is a great way to solve this!
Inside this article
What is Seller Hub Reports?
Seller Hub Report, previously called eBay File Exchange, allows you to you can upload spreadsheets (xlsm, xlsx, txt, csv files) containing product data and product image links. You’ll need external image hosting like Img.vision offers to use this method efficiently.
Create an eBay Sellers account
Hey, before you can sell on eBay you’ll first need to create an eBay sellers account. Visit the eBay create seller account page to get started.
How to access Seller Hub Reports
- Login to your Seller Hub
- Go to “Listings“
- Click the button called “Create listing“
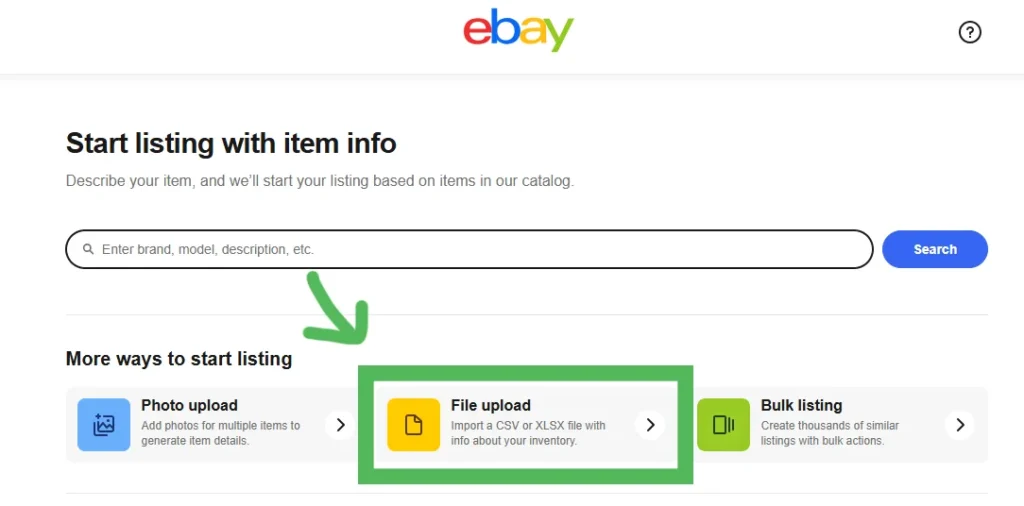
- Click the “File upload” button
Alternatively, after logging into Seller Hub, Click the “Reports” tab.
Steps to Seller Hub Reports
Step 1: First download the right template.
- Click the Get template button
- Select as source Listings
- Select as type “Create or Schedule new listings“
- Select the file type : Excel Spreadsheet (xlsx) or Comma separated file (csv)
- Select the categories of your products. You can choose between five or ten categories.
- Download the file
Step 2: Fill in the template.
Step 3: Upload the template.
Step 4: eBay creates the listings based on the info in the excel.
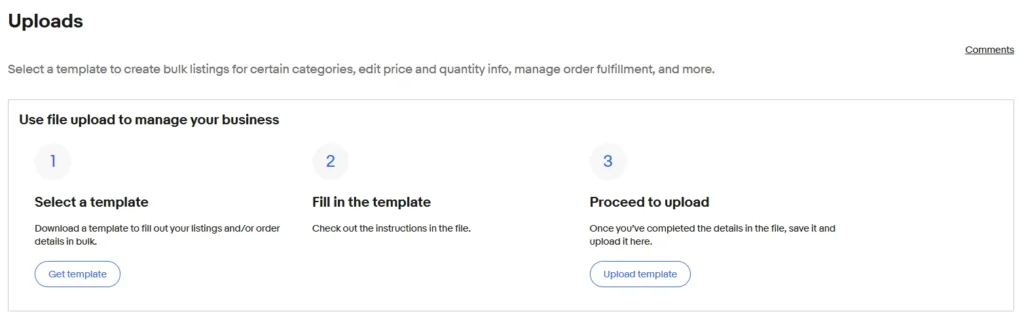
Image hosting for your product images
In order to complete your Excel spreadsheet or CSV file with product images, you’ll need to get a fast and reliable external image host that specializes in ecommerce.
Check out the image hosting features of Img.vision, and register an account. Prices start as low as 4.99USD/mo. We have many eBay sellers as customer and have been in business for many years.
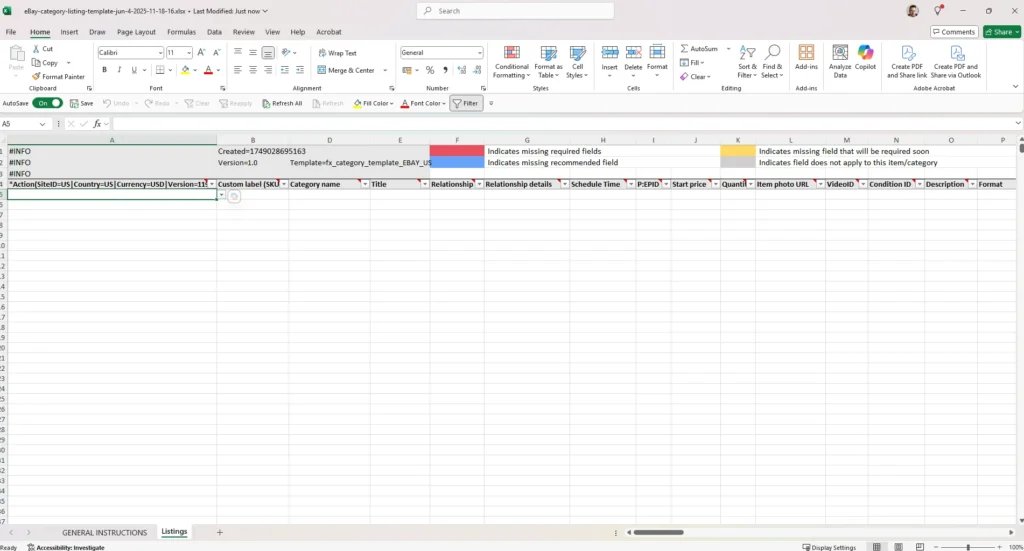
Using Excel (xlsx) files
If you have Microsoft Excel, choose the Excel file to download. This approach is easier than the CSV file method.
The file you download has a lot of notes and information inside. Each column has a note indicating:
- If the field is required
- A description of the field
- The format of the value
- Optionally a list of values you can use
- Optionally a character limit
Using CSV files
The hardest part is using the CSV files so I’ll explain how to that that here.
We’re going to download the csv file and open it in your spreadsheet.
I’ll show you how 2 popular spreadsheet programs work:
- Google Sheets
- Microsoft Excel
Open your CSV in Google Sheets
First upload the product-combines.csv file to your Google Drive:

Then open the file and choose to open it with Google Sheets:
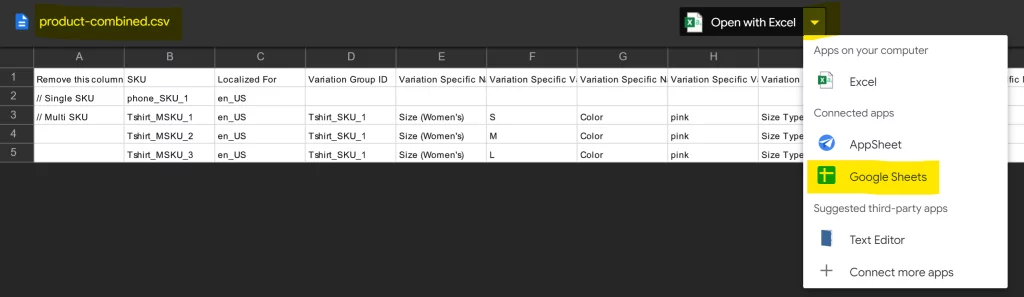
The file will be loaded automatically into the cells, and you can start editing:

Open the CSV in Excel
Excel should automatically fill in the values in the correct cells.
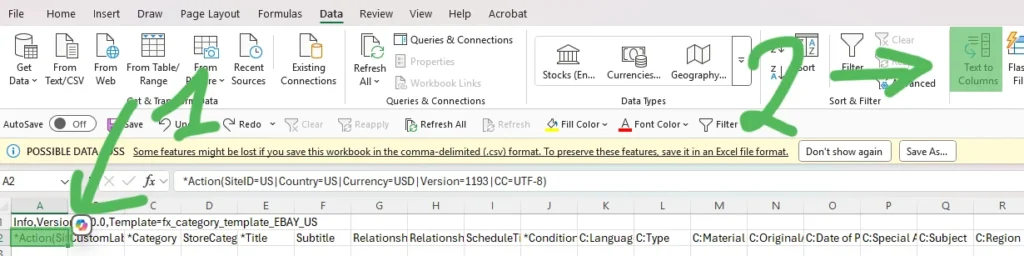
If not, then:
- Select the second row, first cell
- Open the toolbar tab Data
- Choose Text to Columns
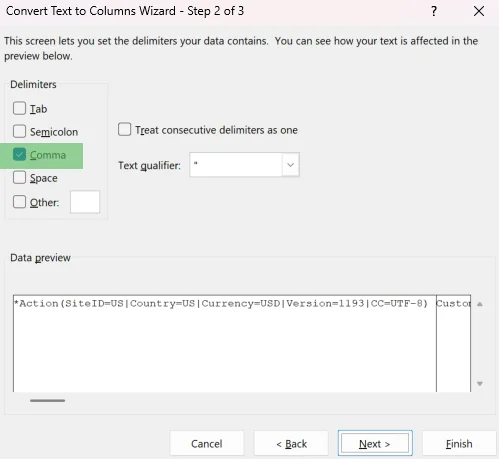
Choose that the values are delimited with a character:
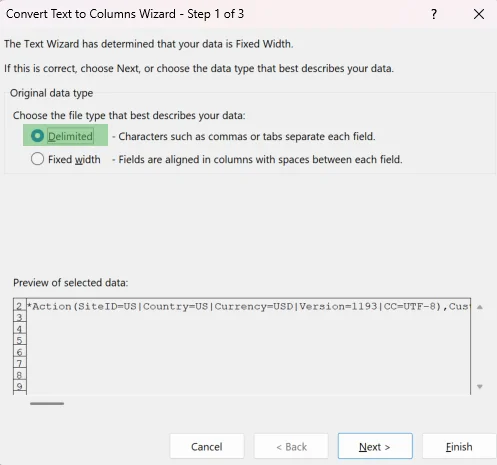
Choose comma as character that is being used to separate the values. After which you can click Finish.
Upload your product images and grab the link code
- Register an Img.vision account. Img.vision has many eBay sellers using the service. Prices start at 4.99USD/mo.
- Upload your product images to your Img.vision drive
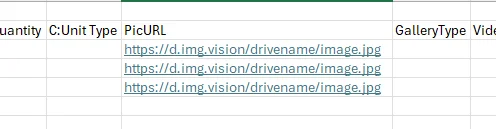
- Select your uploaded image and copy the link code from the Share Bar
- Add the link code to your spreadsheet
Paste the links in your in the right cell:
Save your file as a CSV file
We must save the file back to a CSV file when we’re done, we cannot keep it as a fully featured spreadsheet file.
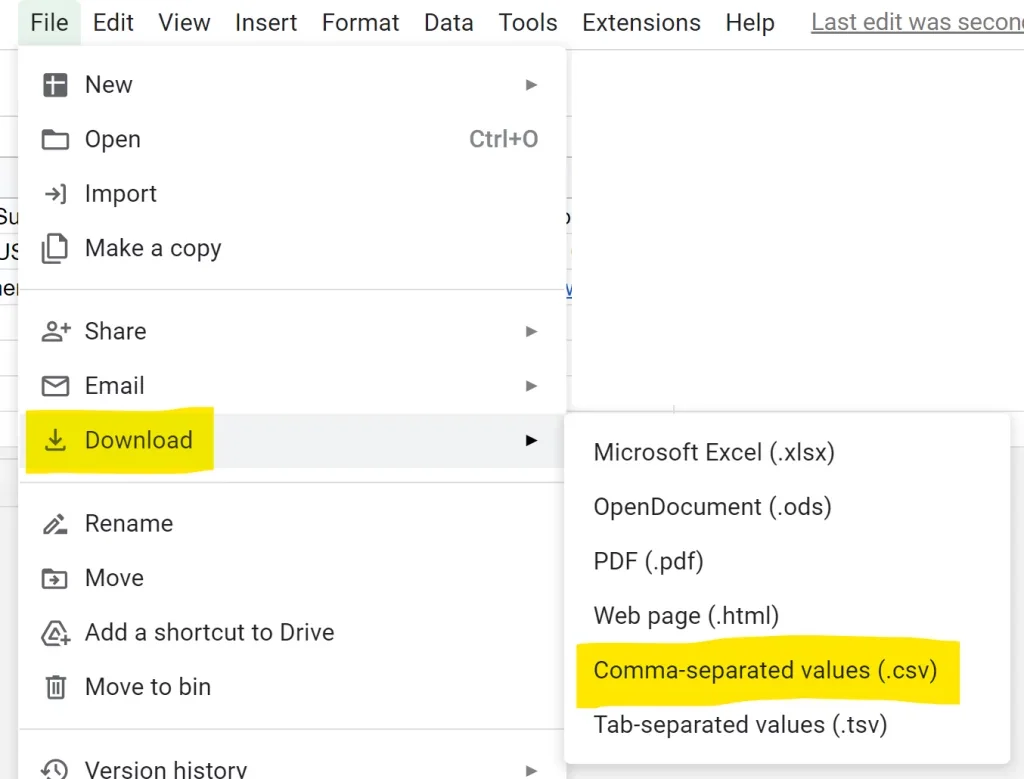
- In Google Sheets: File > Download > Comma-separated values
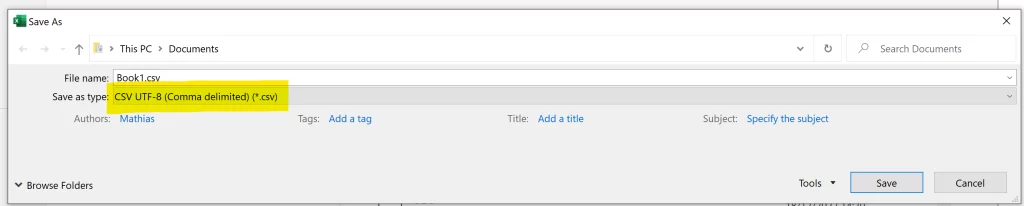
- In Microsoft Excel: File > Save As > Other locations > Browse