Add Images to a Single eBay Listing: 3 Per‑Listing Methods (Step‑by‑Step)
You can add additional images to your eBay listings inside the description with no extra charge by eBay.
You need an image hosting service to host the images like Img.vision. Visitors to your eBay listing will load these extra images directly from the image host’s servers.
What this page covers
Who is this guide for
You’re a small eBay seller with a curated catalog, and you care deeply about pixel‑perfect listings that convert. You don’t need bulk upload workflows today, you want the best way to add extra photos to one listing at a time, keep layout control, and elevate trust.
This guide covers three per‑listing image methods, with pros/cons and quick selectors so you can pick the right one fast.
TL;DR
- Best conversion control: HTML block pasted into the description (you decide order, captions, spacing).
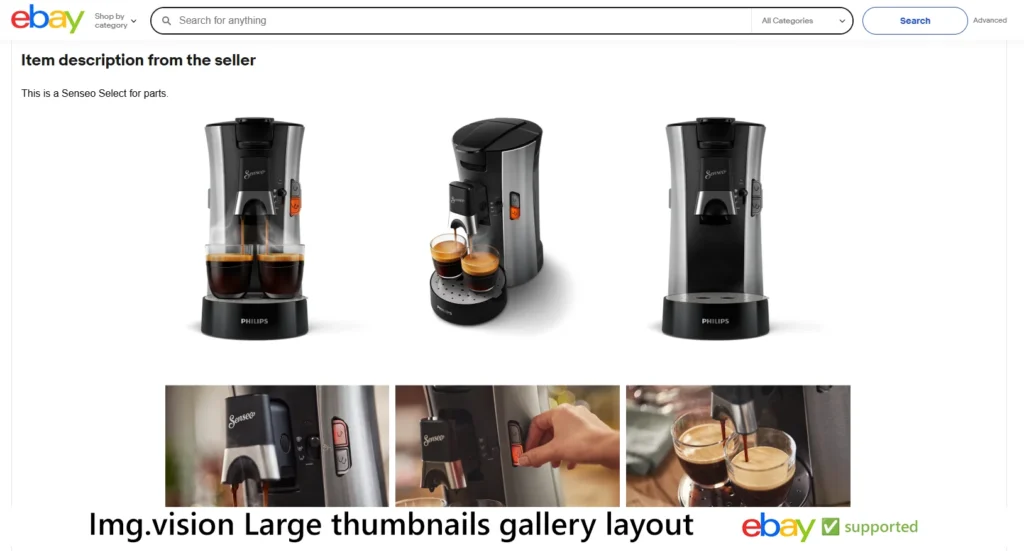
- Best visual polish: Description photo gallery generated by Img.vision (4 layout options, consistent styling).
- Fastest & simplest: Drag & drop images directly into your listing description (desktop).
The 3 per-listing methods
Important: These methods add images inside the description and complement eBay’s main image gallery (the photos you upload into eBay’s standard image slots). Description images can showcase details, size guides, care labels, bundles, before/after, and more.
1️⃣ Method 1: Paste an HTML image block into your description
Best for: Sellers who want precise control over image size, order, and captions without extra tools.
Video: Video of how to add an image to your eBay listing
How it works
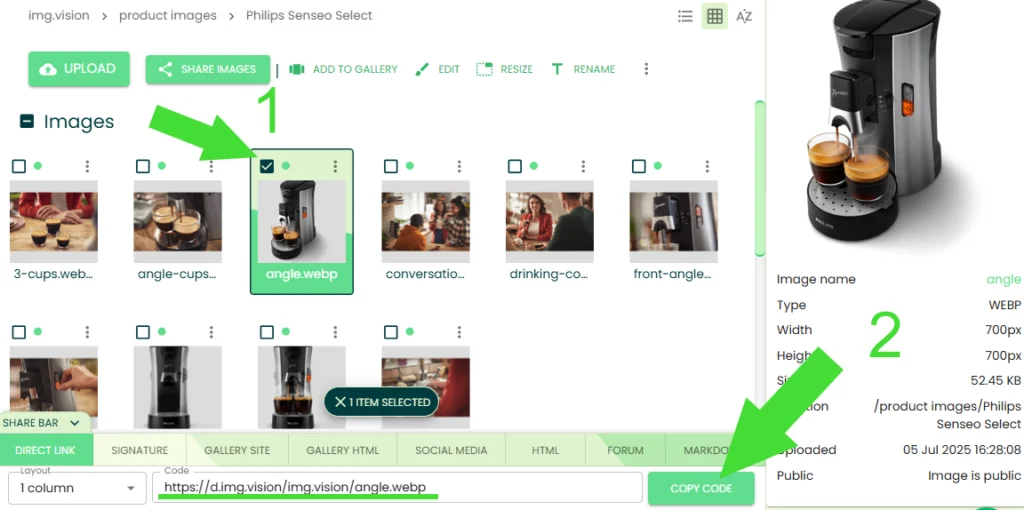
- Upload images to your Img.vision drive.
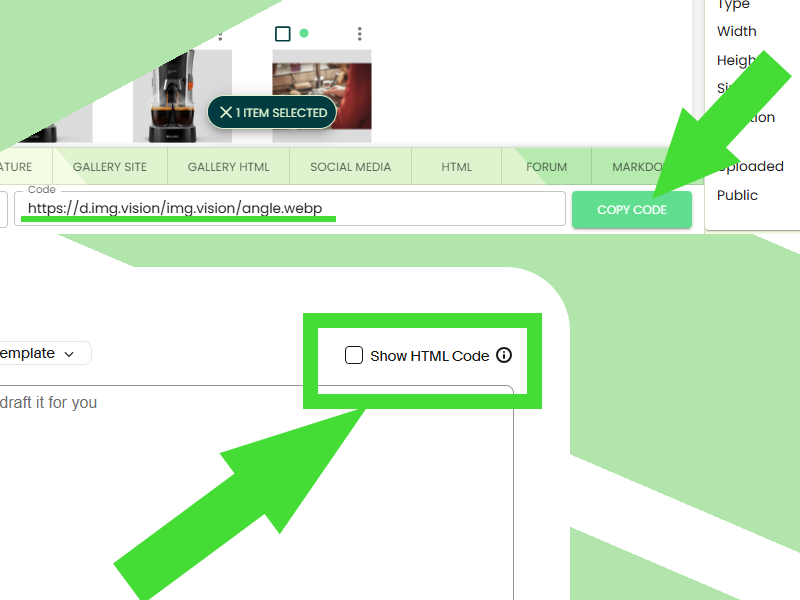
- Copy the provided HTML snippet that includes your direct image links.
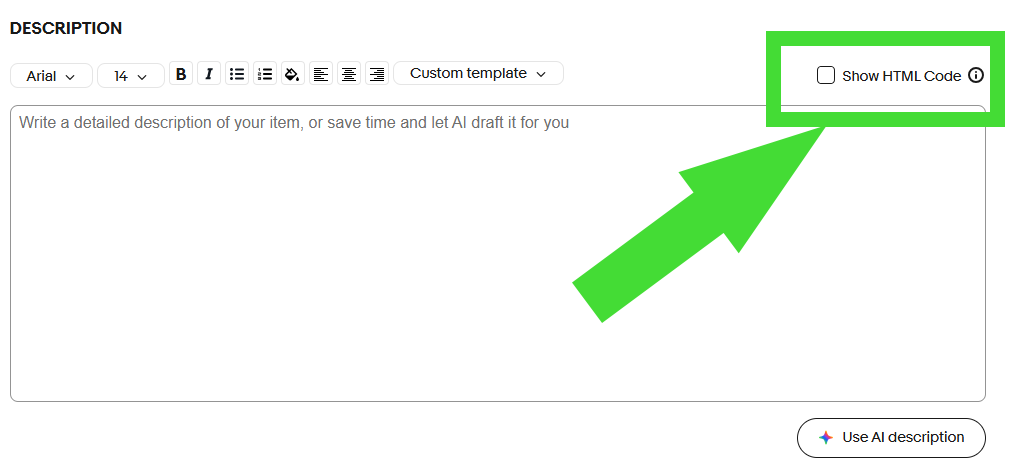
- In eBay’s listing editor, switch the description to HTML view.
- Paste the snip
Pros
- Ultimate control over layout (spacing, captions, alignment).
- Lightweight: no extra widgets or iframes.
- Highly portable across listings or templates.
Cons
- Requires switching to HTML view.
- You’ll manage responsiveness (keep widths to 100% or max‑width CSS).
Pro tips
- Use
alttext for accessibility and SEO in external surfaces. - Keep images ≤1600-2000 px on the long side for sharp zoom without bloat.
- Ensure static HTML only (no scripts) to align with eBay’s description policies.
2️⃣ Method 2: Insert a photo gallery into your description (4 layouts)
Best for: A polished, branded look with minimal manual formatting.
Guide: Adding an image gallery to your eBay listing’s description guide
Video: Video guide how to add an image gallery to your eBay listing’s description
How it works
- Upload images to Img.vision.
- Create a gallery and add your images to the gallery.
- Open the eBay gallery generator and choose one of 4 eBay supported layouts.
- Copy the generated embed (HTML) and paste it in your eBay description (turn on the HTML mode of the description box).
Pros
- Consistent styling and spacing with zero CSS work.
- Scannable layouts that encourage browsing and dwell time.
- Easy to reuse across similar listings.
Cons
- Less granular than hand‑crafted HTML.
- If you change image order later, regenerate/paste the updated embed.
Pro tips
- Pick a layout that matches your brand aesthetic (e.g. grid vs. carousel‑style).
- Put the gallery near sizing/condition info to anticipate buyer questions.
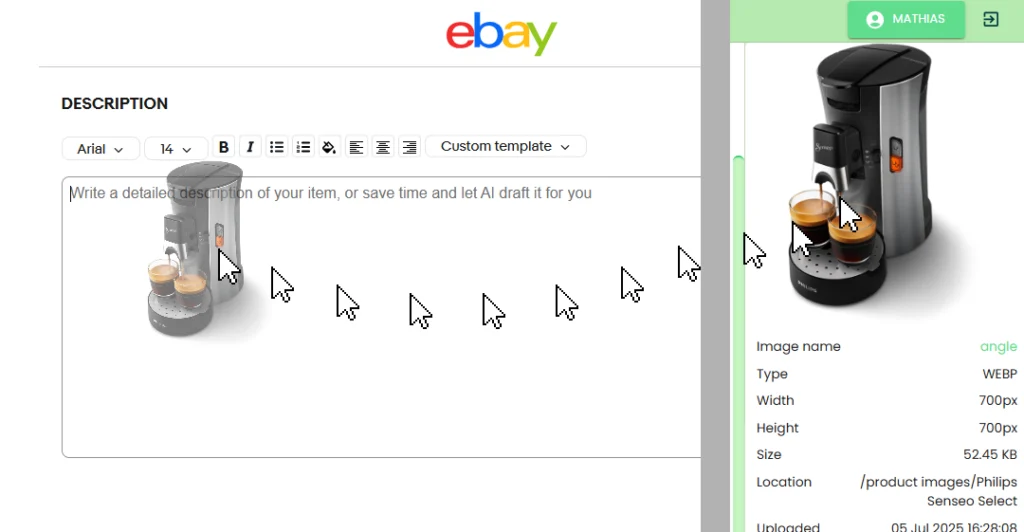
3️⃣ Method 3: Drag & drop images into the description (desktop)
Best for: Speed. No HTML, no generator, just drop and go (On Windows/macOS).
Guide: How to drag and drop images into your eBay listing’s description
Video: Video guide on how to drag and drop images into your eBay description
How it works
- Put the eBay site on one side of your screen and your Img Dashboard on the other side.
- In the eBay listing editor (desktop), place your cursor inside the description where you want the image to appear.
- Select the image in your Img.vision dashboard so the right sidebar shows the preview.
- Drag the sidebar preview image into the eBay listing editor.
Pros
- Fastest method: great for small edits or last-minute additions.
- No code, no extra tools to learn.
Cons
- Less control over exact layout, margins, and captions.
- Behavior can vary between browsers/editors; always preview.
Pro tips
- Prepare images in a consistent aspect ratio (e.g., 1:1 or 4:5) to keep pages tidy.
- Place your images in folders and use clear file names; if you later switch to HTML/gallery, your organization will help.
⚡ Quick chooser: which method should you use?
| Goal | Choose | Why |
|---|---|---|
| Fastest add-on images | Drag & drop | No code, instant visuals. |
| Maximum layout control | HTML block | Fine-tune sizes, captions, spacing. |
| Best visual polish & consistency | Gallery generator | 4 clean layouts, minimal tweaking. |
| Reuse common image sets across related listings | Gallery generator | Copy once, paste everywhere. |
| Add technical diagrams / bundled with shots with notes | HTML block | Precise placement and labeling. |
✔️ Best-practice checklist for conversions
- Lead with benefits images (what changes for the buyer).
- Show scale (ruler, in‑hand, next to a common object).
- Add defect transparency (close‑ups build trust, reduce returns).
- Keep lighting consistent; prefer neutral background.
- Use 150–200 KB target file sizes where possible for quicker loads.
- Maintain a logical order: hero → angles → details → size/care → extras.
- Add brief captions on key frames (material, fit, compatibility).
- Test on mobile because many eBay sessions are handheld.
🙋♂️ Common mistakes & quick fixes
- Too many similar shots → Curate down to the clearest 5–9.
- Huge files that slow pages → Export at 80–85% JPEG quality; long edge ≤2000 px.
- Buried galleries → Place visual blocks right after the key bullets or main description.
- No alt text in HTML embeds → Add alt tags for accessibility and SEO. Inside the <img> html tag add code like this
alt="description", for example<img href=''https://link">becomes<img href=''https://link" alt="description">. - Inconsistent margins → Use a generator layout or add simple CSS to have consistent margins, paste this code into the HTML view:
img{max-width:100%;height:auto;margin:0 0 12px;}
❓ FAQs
Is this different from eBay’s main image gallery?
Yes. These methods add extra visuals in the description, which complement your main eBay gallery images.
Are external images allowed in descriptions?
Static image HTML is commonly used on eBay. Avoid scripts or active content. Always preview and follow current eBay description rules.
Will mobile buyers see the images?
Yes, but always preview on mobile to ensure sizing, padding, and readability hold up.
Which layout converts best?
Across small sellers, clarity + consistency wins: choose either a tidy grid (gallery generator) or a minimal stacked layout (HTML) with clear captions.
What’s HTML code?
Everything between these brackets: < > is a tag that does something very specifically, like displaying a link or an image. Everything not between these brackets is normal text. A tag always has an opener and a closer. The closing tag will contain the same keyword but have an additional slash after the first bracket. Example of a paragraph tag containg text: <p>text</p>. Paste your image HTML code somewhere inside the existing HTML code and take care not to paste it inside a <tag>, but outside such tags.